


Category: Healthy Snacks

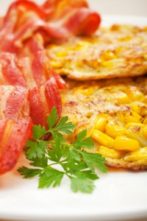
Easy Eggs in Baked Porky Cups
Get ready to give this Easy Eggs in Baked Porky Cups recipe a go! If you are looking for a great breakfast recipe that is gluten-free and dairy-free (like almost all my recipes), then you are in for a treat! These cups are so easy to make, and they taste great. A perfect way to […]
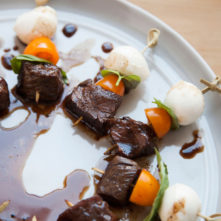
Grass Fed Steak Bites with a Twist
Everyone loves a good Caprese Salad. Adding PRE Brands 100% grass fed Sirloin gives it an extra dose of flavor and protein that is sure to make it a crowd pleaser. A balsamic and honey reduction also sweetens up the classic. This recipe, “Grass Fed Steak Bites with a Twist”, is simple to make and […]
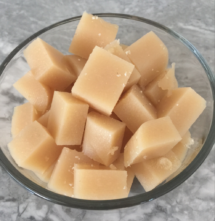
Gluten Free Nutrition Packed Jello
Food is all about balance. Balance means tasty treats too. I am all about treats but since my son is only 13 months old I have to come up with treats on the healthier side. This gluten free nutrition packed jello is extra nutritious because it has the fiber from apple sauce instead of straight juice and […]
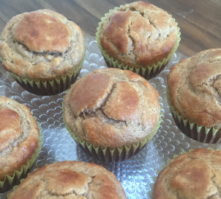
Grain-Free Banana Muffins
Diets are always a hot topic. With our societies health as a whole declining many are searching for that “perfect diet”. In fact, the word “diet” has somewhat of a stigma connected to it. A diet should be a lifestyle change, not something you do for a couple days crazily and then eat flaming […]
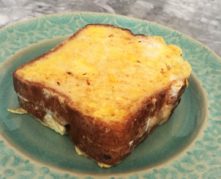
Gluten-Free, Sugar-Free Banana Stuffed French Toast
This morning I was mashing up a banana for my gluten-free son Brixton and had a bunch left over. I thought to myself, “What can I make with ¾ of a banana?” I was obviously hungry and in no mood to put in the time for banana bread so I came up with the idea […]
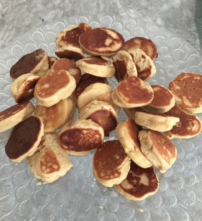
Kid Friendly 3 Ingredient Pancakes
I have been raising my nearly one year old son, Brixton, on a gluten-free diet since he was born. Though I am still nursing him, I have been focusing on a grain-free or even a more paleo friendly approach. Meaning, I have been avoiding grains and even legumes up to now. He is a terrific […]

Gluten-Free, Grain-Free, Dairy-Free Almond Milk Kefir- Recipe
For a dose of healthy probiotics and deliciousness, make a batch of almond milk kefir. This recipe was contributed by Judy Willardson. INGREDIENTS: Almonds A bit of honey Kefir starter grains DIRECTIONS: 1. Soak the almonds for a day or so, then put in the blender, then strain it. 2. Add a […]

Gluten-Free,Grain-Free, Dairy-Free Round Chocolate Spirulina Balls: Recipe
These gluten-free, grain-free goodies are raw and made with a dehydrator. They are a great snack before or after a workout and kids love them, too. (This makes a small batch. Double up on the ingredients for a larger batch.) INGREDIENTS: ¾ – 1 c coconut butter (more for a creamier texture) […]

Gluten-Free, Grain-Free Culture Starter with Veggies- Recipe
For some good-for-you gluten free, probiotics and a yummy snack, make this recipe contributed by Judy Willardson. INGREDIENTS: Kefir starter grains Assortment of vegetables such as cabbage and celery A bit of apple DIRECTIONS: Mix kefir starter grains with veggies and apples and some liquid, such as water or vegetable juice, covering […]
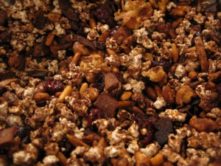
Just Poppin Maple Sorghum Kashi
This is an altered version of a recipe supplied by Just Poppin for their granola. It was a pleasure to help create this ultimate snack food recipe! INGREDIENTS: 3 c popped sorghum ½ c slivered almonds ½ c shredded coconut (sweetened) ¼ c maple syrup 2 tbsp vegetable ¼ c sesame seeds ¼ c […]

Pumpkin Seed Treats
These gluten-free, grain-free goodies taste like they’re from the oven, but they’re raw. Kids just love these as a special surprise in their lunchbox or waiting for them on the kitchen table when they get home. Dip them in some soymilk for extra deliciousness! INGREDIENTS: 1 c pumpkin seed meal (butter) 3 tbsp date […]

Dijon Balsamic Salad Dressing
I recommend that you keep a bottle of this dressing around in the kitchen. Not only is it gluten-free, but it tastes delicious on every type of salad I make. You can also make it with rice wine vinegar. INGREDIENTS: ¼ c extra virgin olive oil ¾ c balsamic vinegar 1 clove garlic ½ […]
Spicy Kale Chips
This gluten-free, grain-free snack is also raw. Dip these in some hummus or some homemade dip. Yum! INGREDIENTS: Red peppers Cashews Sunflower seeds Lemon Yeast (SAF) Scallions Garlic Bunch of kale DIRECTIONS: 1. Mix ingredients together and “massage” with a bunch of kale. 2. Dehydrate. Tina Turbin www.GlutenFreeHelp.info k.m.
Amazing Gluten-Free Corn Sheet Fritters
There’s nothing like these gluten-free fritters. I came up with the idea for them from a restaurant I can’t recall the name of. These are delicious with a little chipotle mayo sauce or even add a dash of hot sauce to the mix before frying to add a punch. INGREDIENTS: 4 fresh corn on the […]
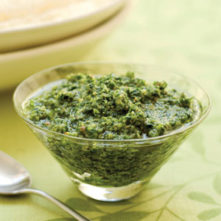
Gluten-Free, Grain-Free Pumpkin Seed Basil Pesto
I’d like to thank Sun Power Cafe in L.A. for this gluten-free, grain-free recipe that’s also raw. Try it with your favorite gluten-free or grain-free pasta. INGREDIENTS 6 c fresh basil 1/3 c pumpkin seed (soaked 4 hrs) 1 tbsp lemon 2 cloves garlic 1/3 c extra virgin olive oil 1 tsp salt ½ tsp […]
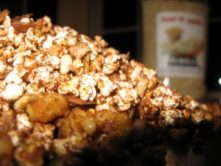
Just Poppin Gluten-Free Sorghum Cinnamon Kashi
I had a blast coming up with this altered version of a recipe supplied by Just Poppin for their granola. There’s nothing like snacking on this gluten free treat during Movie Night, or leave a bowl out for the kids to enjoy when they get home from school. Check out the review I did […]
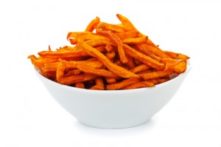
Gluten-Free, Grain-Free Sweet Potato Fries
I like to make these at barbecues and in place of French fries as a healthier alternative. They are gluten-free and grain-free. They also make a great side dish. INGREDIENTS: ½ c orange juice ¼ c oil (optional) ½ tsp of: ground ginger garlic salt pepper Cayenne pepper to taste (optional) DIRECTIONS: […]

Gluten-Free Nut Butter Rice Crisps
This is fun, easy, gluten-free and absolutely loved by people of all ages. Kids have fun making this and you can add variety. Terrific as a snack for your child’s lunchbox! INGREDIENTS 1 cup creamy nut butter (peanut, almond, etc.) ½ cup room-temperature honey (or ½ cup honey and ½ cup maple syrup) Gluten-free […]

Gluten-Free,Grain-Free Delicious Chicken Salad with Paprika Sandwiches
What a delicious lunch or snack, high in protein and oh-so-satisfying! Yes, it is simple, but I use only the Vegenaise, and it just is the right condiment for this one, for those of us who are gluten– and dairy-free. INGREDIENTS Chicken breast halves 1 c VEGENAISE mayonnaise 1 tbsp paprika ¼ tbsp cayenne 2 […]

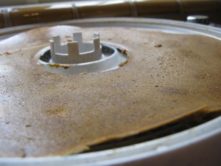
Gluten-Free Crêpes #2
Gluten-free crêpes are great for special occasions and holiday brunches. You busy gluten-free cooks can make a stack of versatile gluten-free crêpes ahead of time. Use a blender to make really fast and easy crêpe batter. Wrap and freeze them for a fast and convenient special-occasion dessert. Serve with raspberry sauce, or your favorite fruit […]